Note: this was converted from LaTeX to Markdown using ChatGPT 4.1. The original PDF can be found here along with the bibliography.
Exercise 6: GNU/Linux - Securing active components
Laboratory protocol
Exercise 6: GNU/Linux - Securing active components
Class: 3AHITN
Name: Stefan Fürst, Marcel Raichle
Group Name/Number: Team 7/7
Supervisor: SPAC, ZIVK
Exercise dates: 6.12.2024, 13.12.2024, 20.12.2024, 3.1.2025, 4.1.2025, 5.1.2025
Submission date: 4.1.2025
Table of Contents
- Task definition
- Summary
- Complete network topology of the exercise
- Exercise Execution
- References
Task definition
Task 0 - Preparation
Ensure your server from Exercises 4 and 5 is configured with SSH. Verify that you can connect to the server via SSH using a client with a GUI.
Task 1 – Installing a Web Server
Install a web server (e.g., Apache or Nginx) and deploy a static HTML page displaying your group number, team members, and an AI-generated image. (Bonus: Deploy a dynamic PHP page.) Demonstrate access to the page from a client browser.
Task 2 – Securing with Basic Authentication
Set up Basic Authentication on the server. Create user accounts in the format nnv-webuser and for your instructors (e.g., zivk-webuser). Demonstrate authentication functionality. (Bonus: Capture the password using Wireshark.)
Task 3 – Encrypting with HTTPS
Enable HTTPS with a self-signed certificate, including your group number. Demonstrate encrypted access and explain potential issues. Install the certificate on a client to show why this action is not required in the public internet.
Bonus Task – Local DNS Setup (Optional)
Set up DNS on the server using bind9 for local access via xxx.itsi3.local. Demonstrate DNS resolution and access the website by domain name.ChatGPT1
Summary
As preparation for the exercise, I optimized the Docker workflow by using Docker Compose for easier management, improved the readability of the Dockerfile, and, most importantly, created a .env file along with a build script that utilizes it, so I no longer hardcode my passwords in the Dockerfile. Additionally, I disabled password authentication and now copy the authorized_keys file into the container, allowing for key-based authentication from the start and enabling me to disable password authentication.
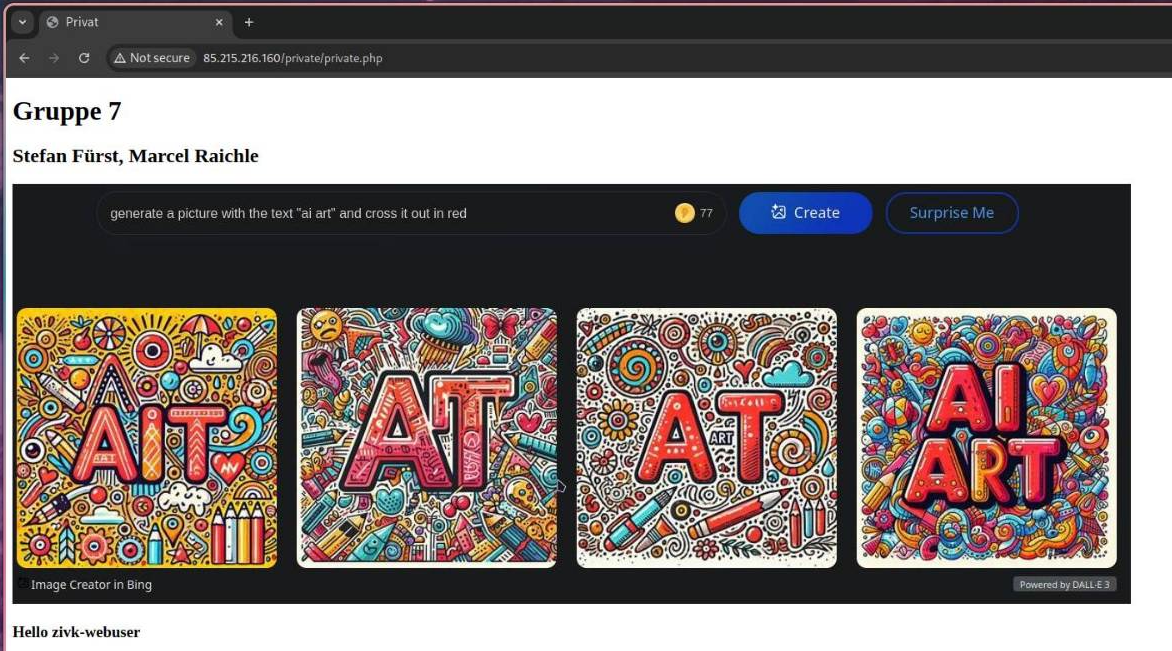
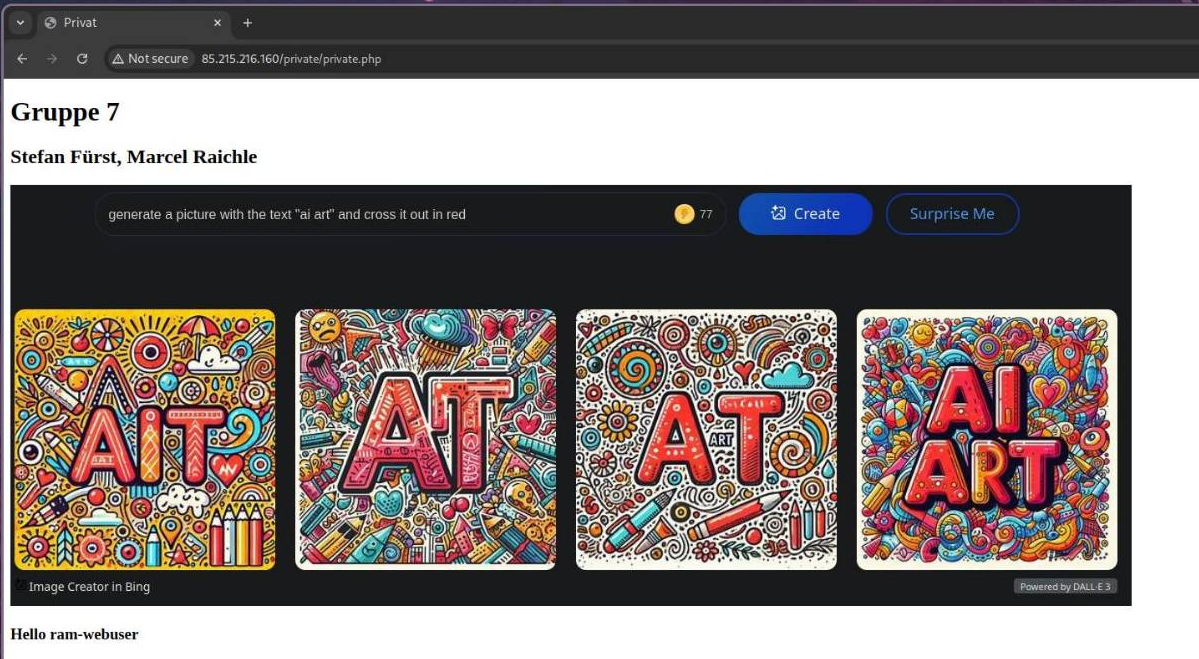
We need to install a web server, for which I chose nginx. I used it in conjunction with php-fpm to deploy a dynamic PHP webpage. The webpage includes our group number, names, and an AI-generated image. However, since this information should only be accessible with credentials, I implemented Basic Authentication to secure it. For this, the apache2-utils package was used to generate a .htpasswd file containing the credentials.
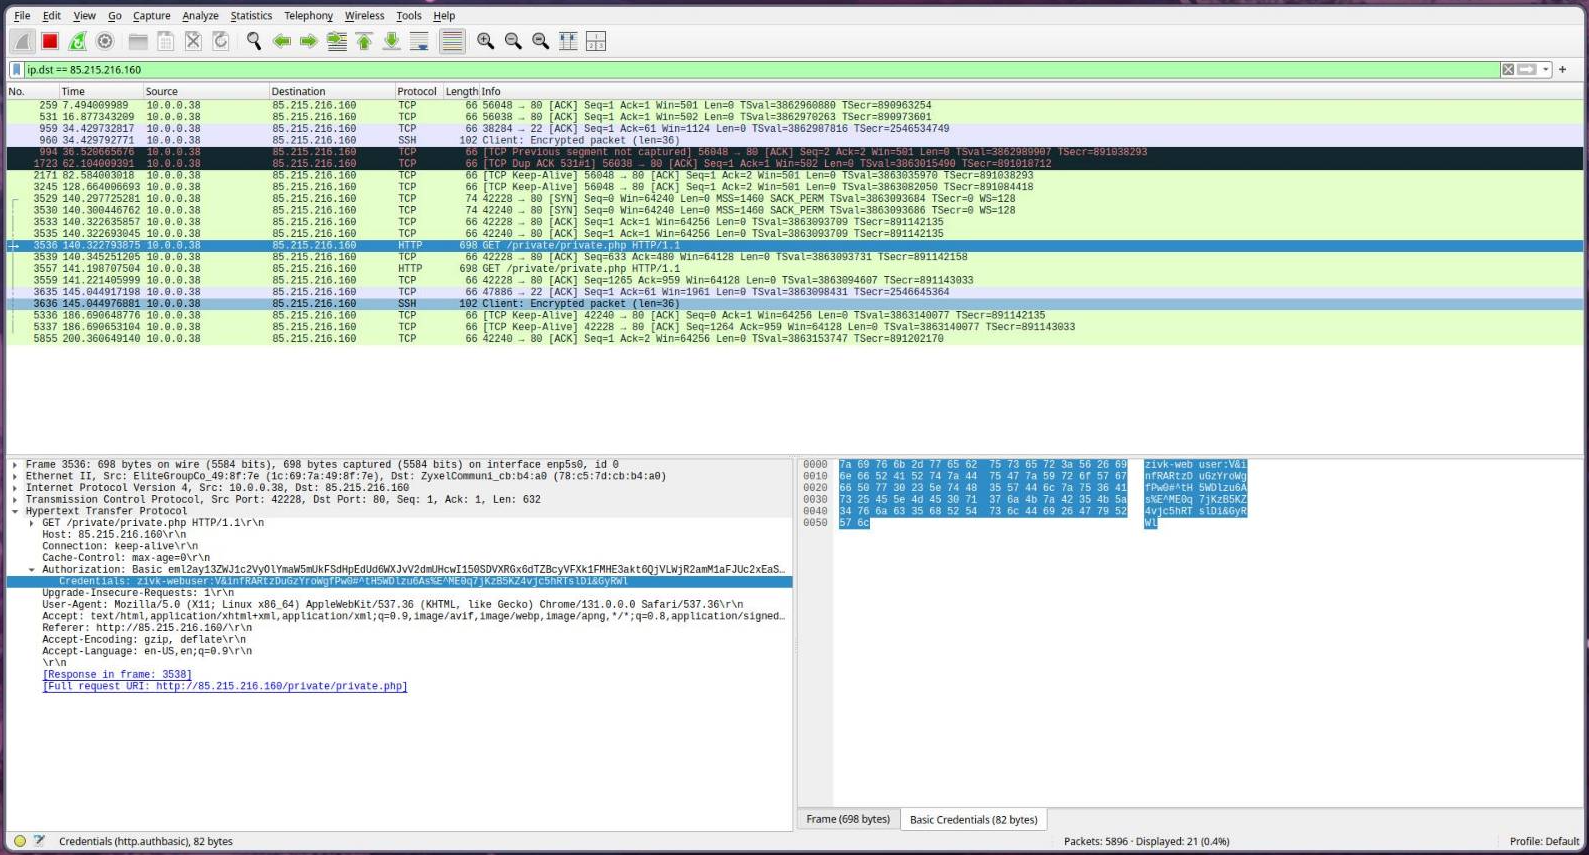
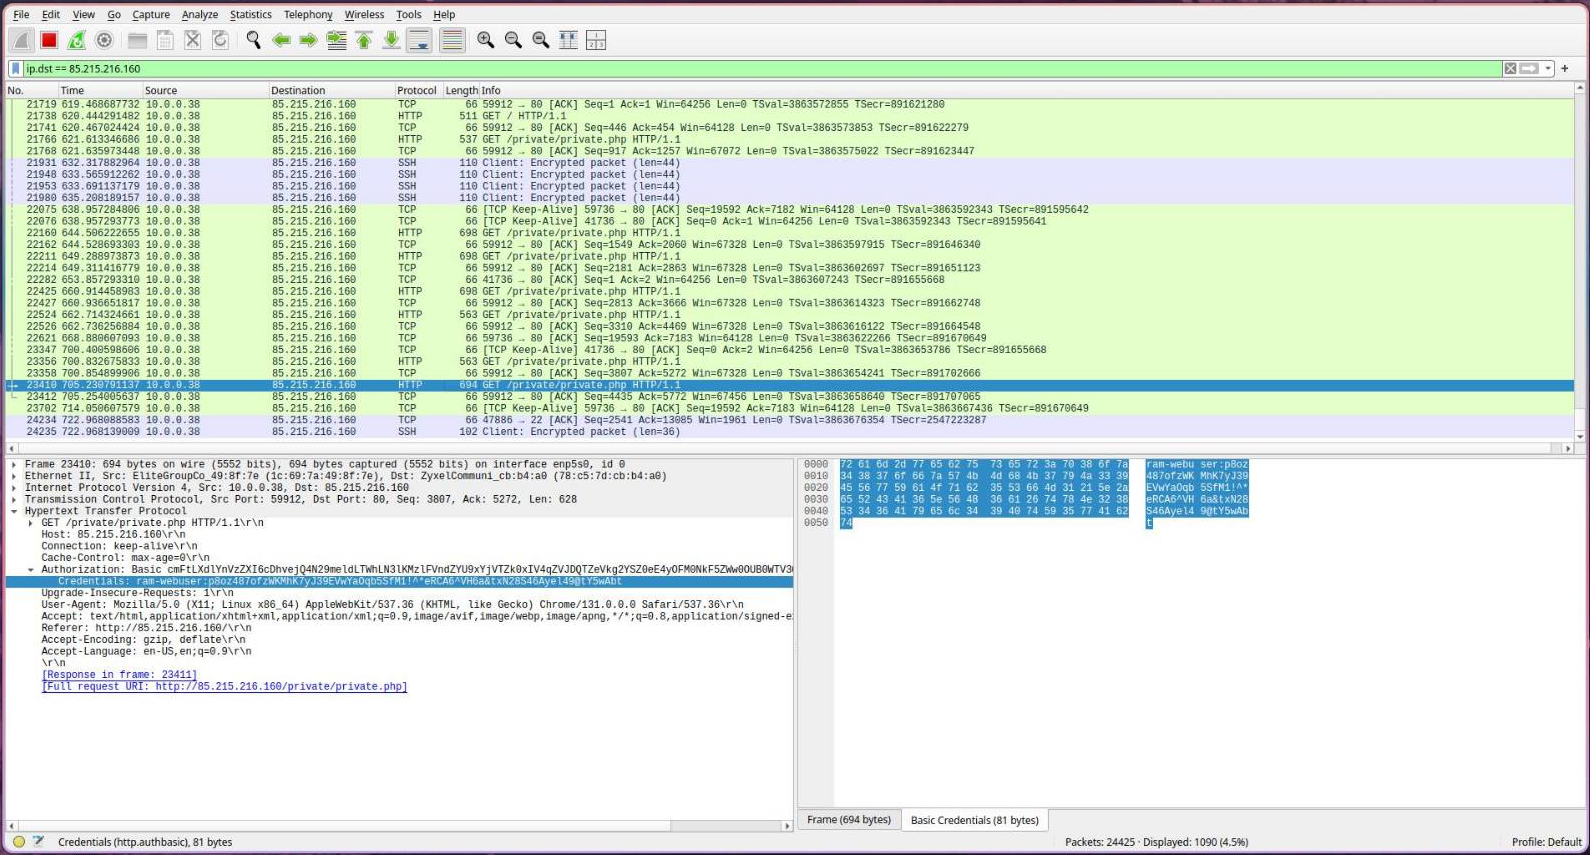
We demonstrated with Wireshark that the credentials were transmitted in plain text while using HTTP. To address this, a self-signed SSL certificate was generated using openssl, with the group number included in the OU field of the certificate. The server was then configured to use HTTPS. We showed that the credentials could no longer be read with Wireshark, as the traffic was now encrypted.
Lastly, we set up a domain, created a DNS record to point to the server, and generated a proper SSL certificate with Let’s Encrypt, ensuring it is trusted and does not display a warning in the browser.
Complete network topology of the exercise
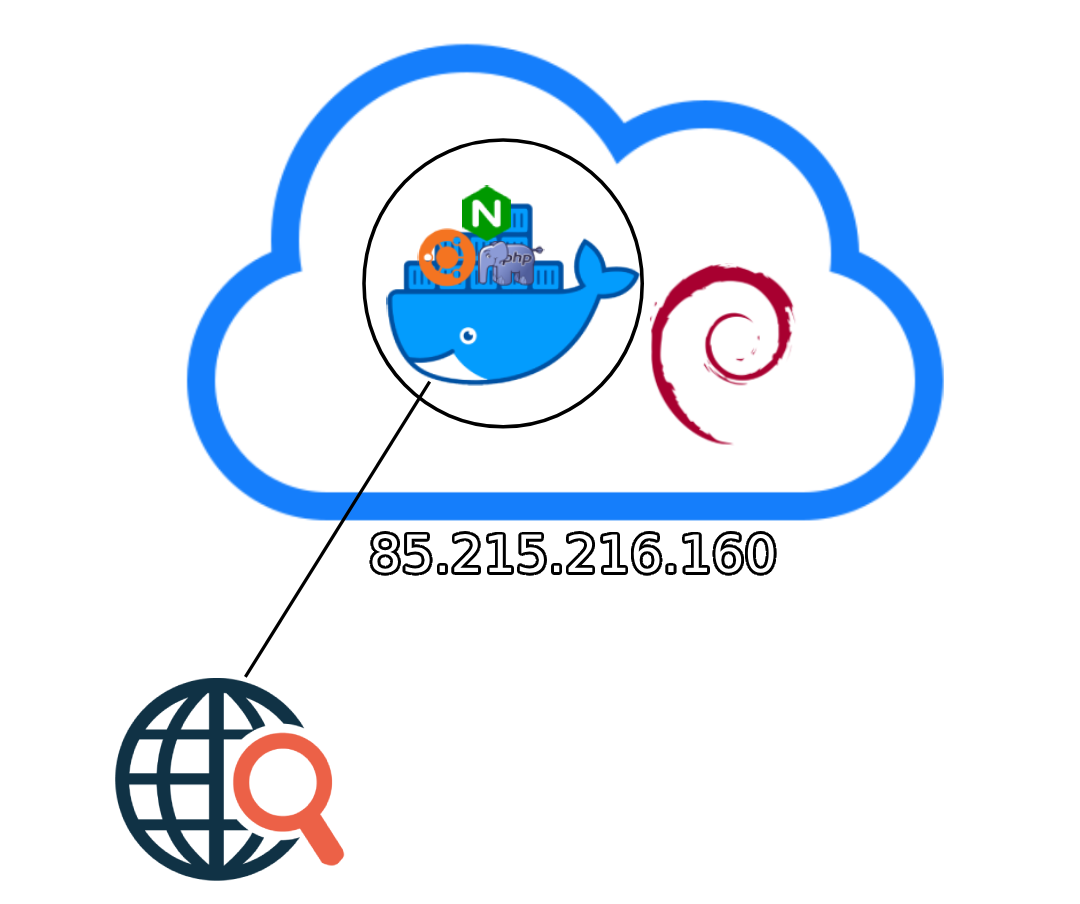
Exercise Execution
Preparation
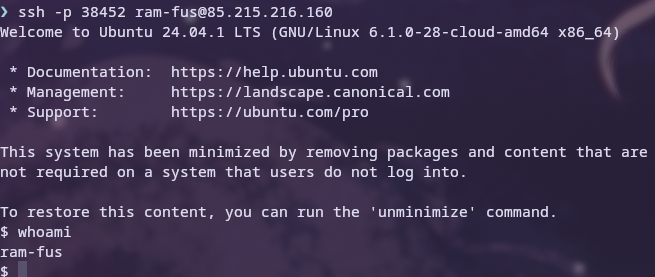
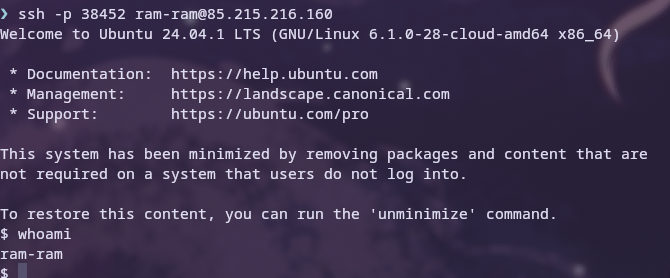
The requirements for this exercise are a headless Linux server with hardened SSH, which only allows connections via key pairs. However, I removed the OTP authentication added in the last exercise, as it was overkill for this use case and became a burden to use.

Testing the SSH connectivity

Changes to the Docker setup
To improve the quality of life when working on this project, I switched from aliasing a long and hard-to-read run command to using Docker Compose, which allows you to define and run multi-container applications. Since it’s in a YAML file, it is more readable and easier to work with, even in this use case where I only have one container.Docker-Compose2
services:
    webserver:
        container_name: itsi
        image: itsi:latest
        restart: no
    ports:
        - "38452:38452"
        - "80:80"
        - "443:443"
Furthermore, instead of having all of the credentials in the Dockerfile, I created a .env file in which the passwords are set. To utilize that, I made a build script that passes the variables from the file to the Dockerfile.docker-arg3
#!/bin/bash
export $(cat .env | xargs)

docker buildx build -t itsi:latest\
	--build-arg ROOT_PW=$ROOT_PW \
	--build-arg RAM_WEBUSER_PW=$RAM_WEBUSER_PW \
	--build-arg ZIVK_WEBUSER_PW=$ZIVK_WEBUSER_PW \
	--build-arg RAM_FUS_PW=$RAM_FUS_PW \
	--build-arg RAM_RAM_PW=$RAM_RAM_PW \
	--build-arg RAM_ALOIS_PW=$RAM_ALOIS_PW \
	--build-arg RAM_CHRIS_PW=$RAM_CHRIS_PW \
	--build-arg RAM_BERTA_PW=$RAM_BERTA_PW .
These build-time arguments are referenced in the Dockerfile like this:
ARG ROOT_PW
ARG RAM_WEBUSER_PW
ARG ZIVK_WEBUSER_PW
ARG RAM_FUS_PW
ARG RAM_RAM_PW
ARG RAM_ALOIS_PW
ARG RAM_CHRIS_PW
ARG RAM_BERTA_PW
...
RUN echo 'root:$ROOT_PW' | chpasswd
...
Here is what the .env file looks like for this project:
ROOT_PW='some password'
...
Note that the quotes are only necessary if the password contains characters like &, which the shell will interpret.
With this change, I can add the .env file to my .gitignore file so I don’t accidentally commit my passwords again and handle passwords in a Dockerfile properly.
To still utilize my alias script, I changed every instance of docker run to docker compose up -d, docker stop itsi && docker rm itsi to docker compose down, and added the use of the build script to it.
#!/bin/bash
alias relaunch="sh -c 'docker stop itsi && docker rm itsi &&\
		       ./build.sh &&\
		       docker compose up -d && docker exec -it itsi /bin/bash'"
alias rebuild="sh -c './build.sh &&\
                      docker compose up -d && docker exec -it itsi /bin/bash'"
alias stop="sh -c 'docker compose down'"
Furthermore, instead of having to upload my container every time I rebuild, I added these three lines to copy the authorized_keys file with the devices I use to the container, so that every time I relaunch, I can just immediately SSH into it.
COPY ./mapped-files/authorized_keys /root/.ssh/authorized_keys
COPY ./mapped-files/authorized_keys /home/ram-fus/.ssh/authorized_keys
COPY ./mapped-files/authorized_keys /home/ram-ram/.ssh/authorized_keys
Lastly, the line in the Dockerfile that specifies the exposed ports is edited to expose ports 80 and 443, as they will be required for this exercise.
EXPOSE 38452 80 443
Installing an active component
Now, it’s required to install a web server. I chose Nginx because I am most familiar with it, and due to its high performance and simplicity of use.
RUN apt install -y nginx
...
CMD service ssh start && service nginx start && tail -F /dev/null
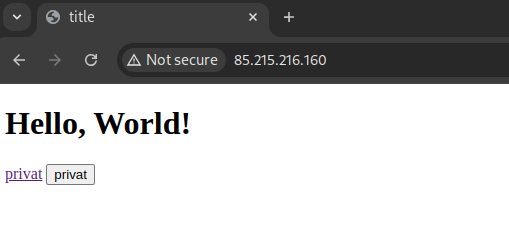
After modifying the Dockerfile, rebuilding, and redeploying, if we now open the web browser and go to the server’s IP, we see the following.
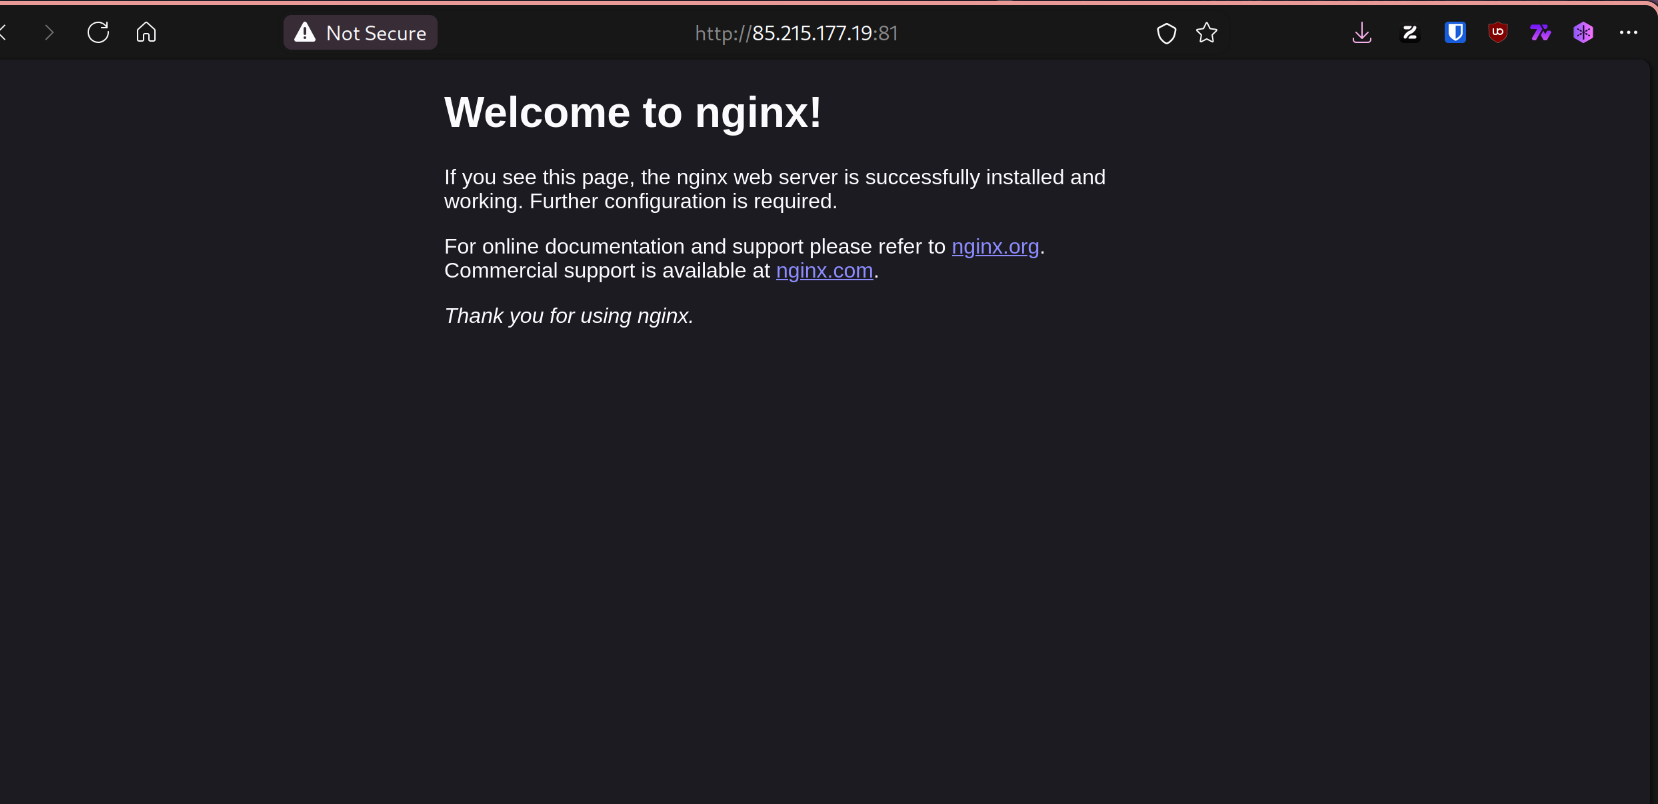
The HTML site displayed is located at /var/www/html/index.nginx-debian.html.
Additionally, I replaced the /var/www/html directory with /var/www/metyr.xyz, in which I have the following file structure:
`-- html
   |-- private
   |   `-- private.php
    `-- public
        `-- index.php
These two directories are mapped onto the Docker container in the docker-compose.yml file, as shown below. Since they are mapped, every time the files are changed on the host, the changes carry over to the container, allowing for an easy and fast development workflow without the need to exec into the container or copy the files when creating the image.
volumes:
    - ./mapped-files/public:/var/www/html/public:rw
    - ./mapped-files/private:/var/www/html/private:rw
Additionally, I edited the Dockerfile to delete the default Nginx configuration file, located at /etc/nginx/sites-enabled/default, a symlink to the file /etc/nginx/sites-available/default.conf, and replaced it with one matching my domain name for better readability.
RUN rm -rf /var/www/html/
RUN mkdir -p /var/www/metyr.xyz/html
RUN rm /etc/nginx/sites-available/default
RUN rm /etc/nginx/sites-enabled/default
COPY ./mapped-files/metyr.xyz /etc/nginx/sites-available/metyr.xyz
RUN ln -s /etc/nginx/sites-available/metyr.xyz /etc/nginx/sites-enabled/metyr.xyz
Setting up PHP-FPM with Nginx
To give Nginx the ability to serve PHP files, the php-fpm (FastCGI Process Manager) package is required.
server{
	...
	index public/index.php;
	location ~ \.php$ {
		include snippets/fastcgi-php.conf;
		fastcgi_pass unix:/run/php/php8.3-fpm.sock;
	}
	...
}
Additionally, the php-fpm service has to be started, so the default command of the container is edited.
CMD service ssh start && service nginx start && service php8.3-fpm start && tail -F /dev/null
If we now rebuild the container, deploy it, and go to the IP address of the server in the browser, we can see the PHP page displayed.
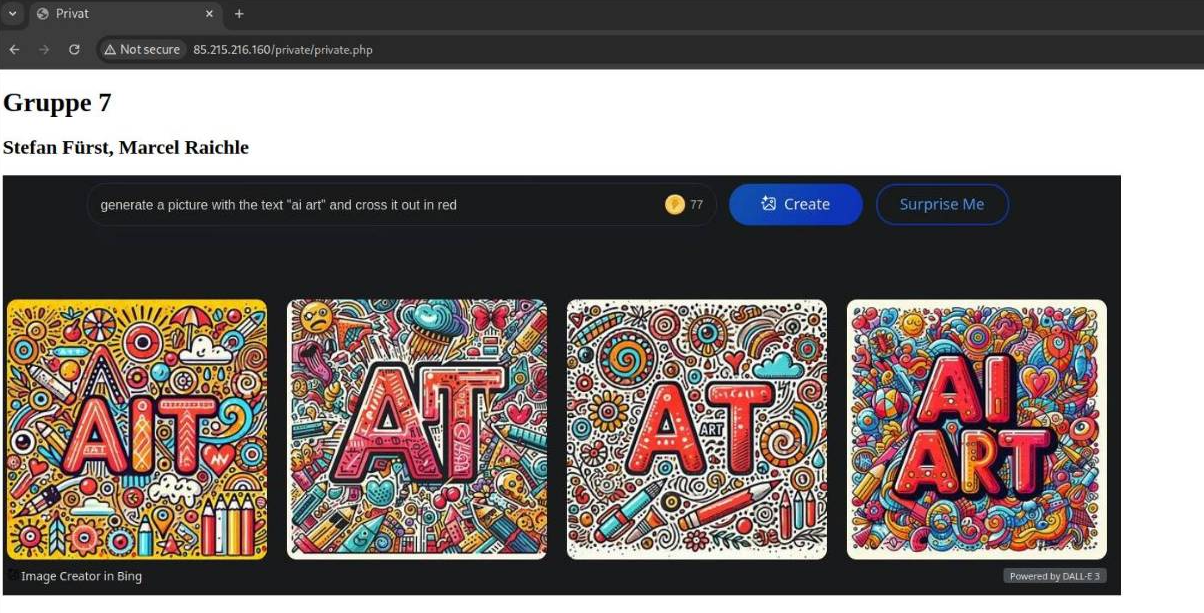
Securing Nginx with Basic Authentication
To restrict access to the website or certain parts of it by implementing username/password authentication, a file containing usernames and passwords is required. This file can be generated using tools such as apache2-utils, which I will use for this exercise.nginx-basic-auth3
Creating a Password File
With apache2-utils installed, we can now generate a password file by using the htpasswd command with the -c flag to create a new file. The file path is specified as the first argument, and the username is specified as the second argument. However, to avoid having to manually type in the password, the -i flag is used to take the password from stdin, which we pass using echo, while using the -n flag to remove the trailing newline.htpasswd4echo-mangapge5
RUN echo -n "$RAM_WEBUSER_PW" | htpasswd -i -c /etc/apache2/.htpasswd ram-webuser
RUN echo -n "$ZIVK_WEBUSER_PW" | htpasswd -i /etc/apache2/.htpasswd zivk-webuser
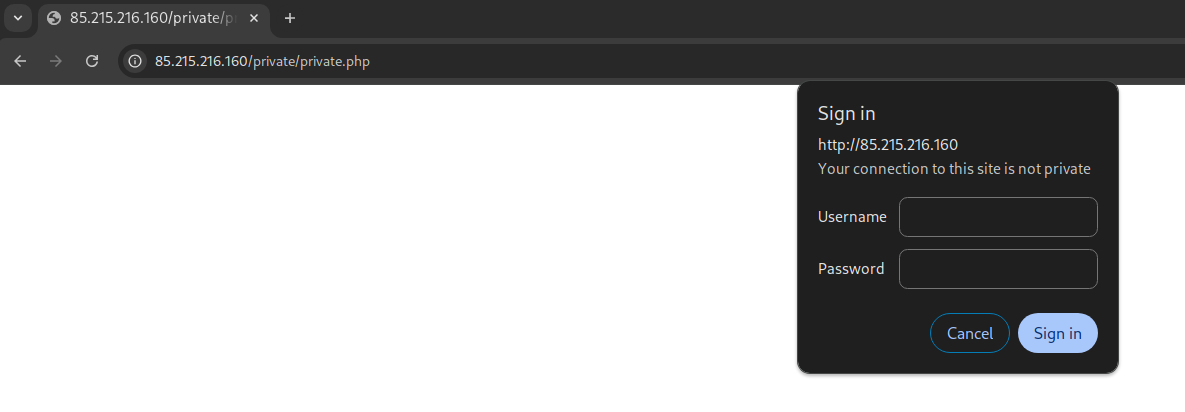
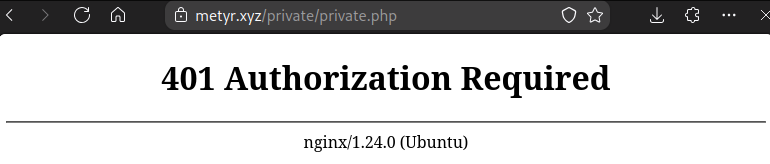
Configuring the authentication in Nginx and testing it
To require authentication for a specific area on the website, we need to create a location block that matches everything in the /private directory. To do this, Nginx URL matching is used.Nginx-url-matching6
location ^~ /private {
	include snippets/fastcgi-php.conf;
	fastcgi_pass unix:/run/php/php8.3-fpm.sock;
	auth_basic "Private Area";
	auth_basic_user_file /etc/apache2/.htpasswd;
}
To visualize testing the login, I added this to the private PHP page to show the currently logged-in user:<h3>Hello <?php echo $_SERVER['PHP_AUTH_USER']; ?></h3>.php-show-basic-auth7
This is still only an HTTP site, though, which means that everything is transmitted in plain text. As a result, with a packet analyzer like Wireshark, the clear-text login credentials can be viewed. To fix this, HTTPS needs to be enabled, which will be covered in the next section.
Configuring HTTPS with Self-Signed Certificates
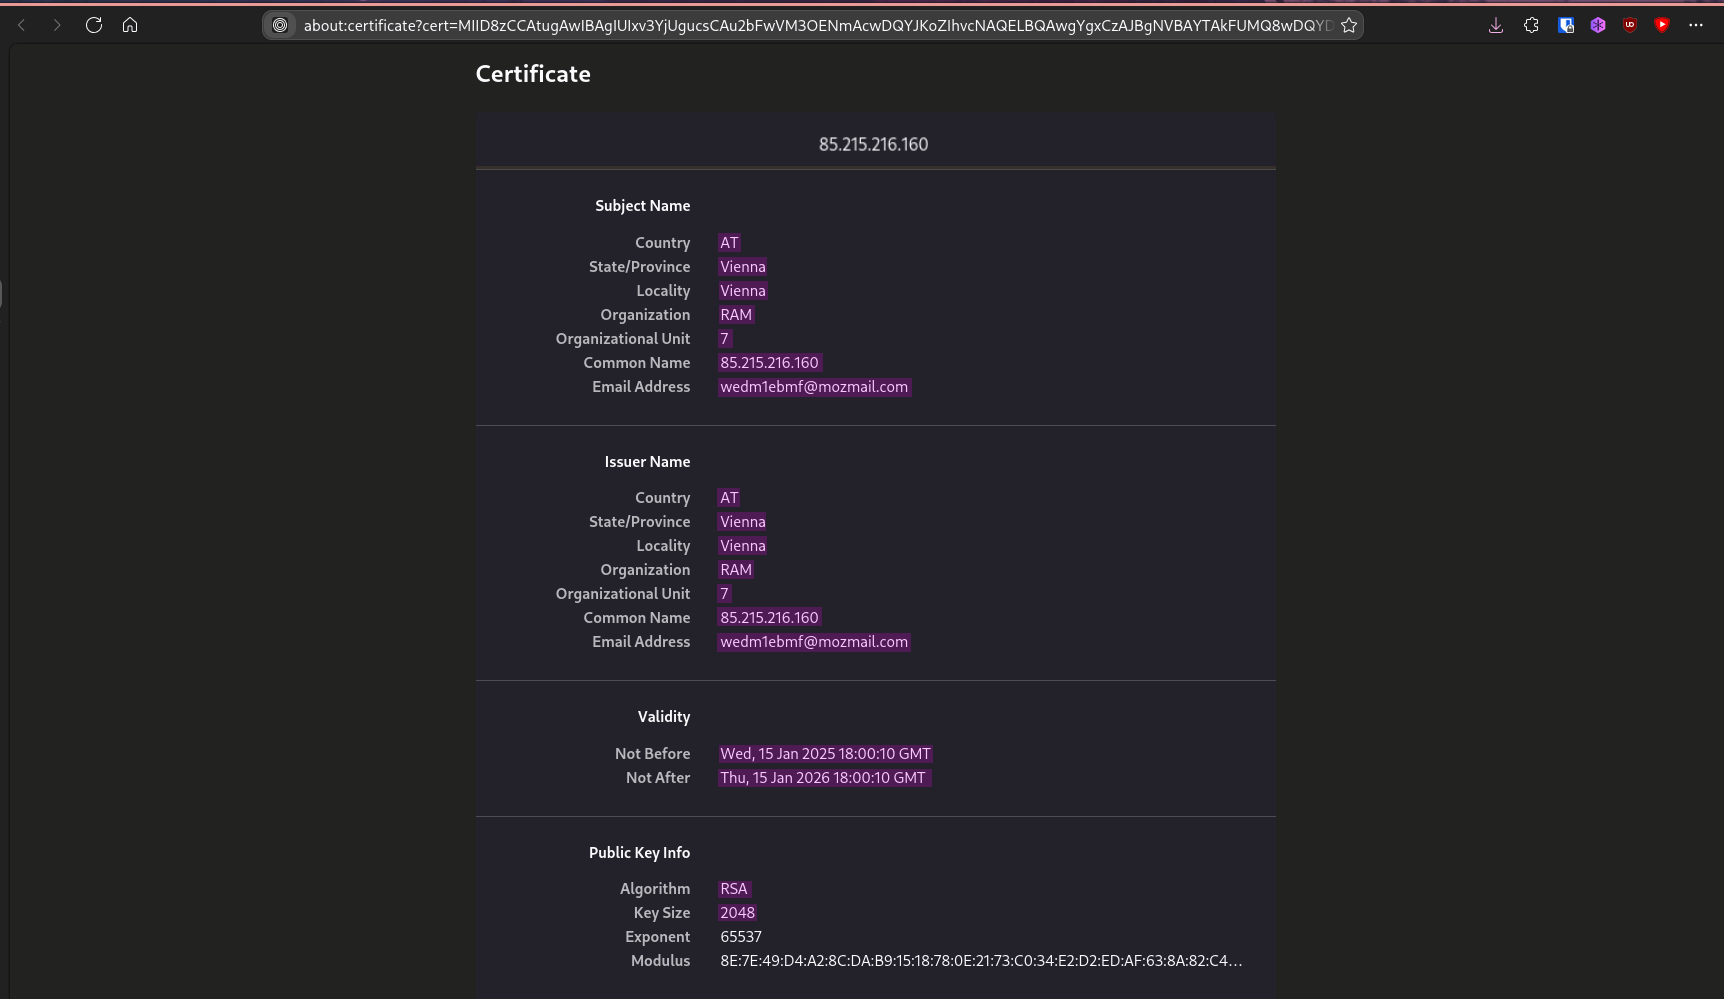
To stop an attacker from being able to read the credentials, HTTPS needs to be enabled on the server to encrypt the HTTP traffic with TLS (Transport Layer Security). Before this can be set up, an SSL certificate must first be created.self-signed-ssl8non-interactive-ssl-gen9
RUN openssl req -x509 -nodes -days 365 -newkey rsa:2048 \
    -keyout /etc/ssl/private/nginx-selfsigned.key \
    -out /etc/ssl/certs/nginx-selfsigned.crt \
    -subj "/C=AT/ST=Vienna/L=Vienna/O=RAM/OU=7/CN=metyr.xyz/emailAddress=wedm1ebmf@mozmail.com"
Now, in the Nginx configuration file, we need to make the server listen on port 443 and add the SSL certificate and key.
server{
	...
	listen 443;
	listen [::]:443;
	ssl_certificate /etc/ssl/certs/nginx-selfsigned.crt;
	ssl_certificate_key /etc/ssl/private/nginx-selfsigned.key;
	...
}
After setting up HTTPS, it’s recommended to set up a 301 HTTP redirect to direct HTTP traffic to the HTTPS site. This is done by adding a second server block at the end of the nginx config file.
server {
	listen 80;
	listen [::]:80;
	server_name _;
	return 301 https://$server_name$request_uri;
}
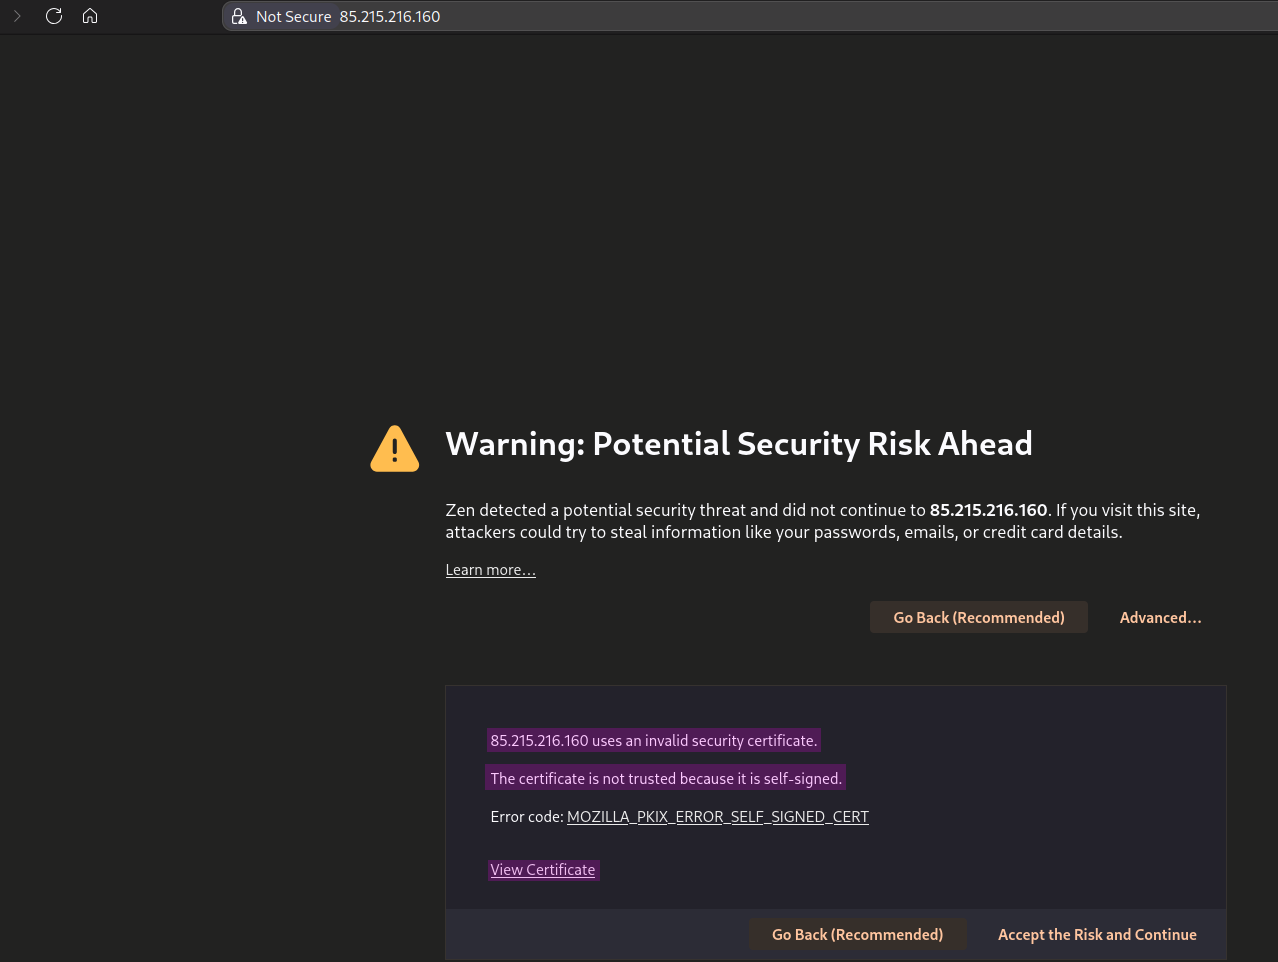
If we reload the Nginx configuration, our browser is going to give us a security warning since it recognizes that the certificate was not signed by a trusted organization but by ourselves.
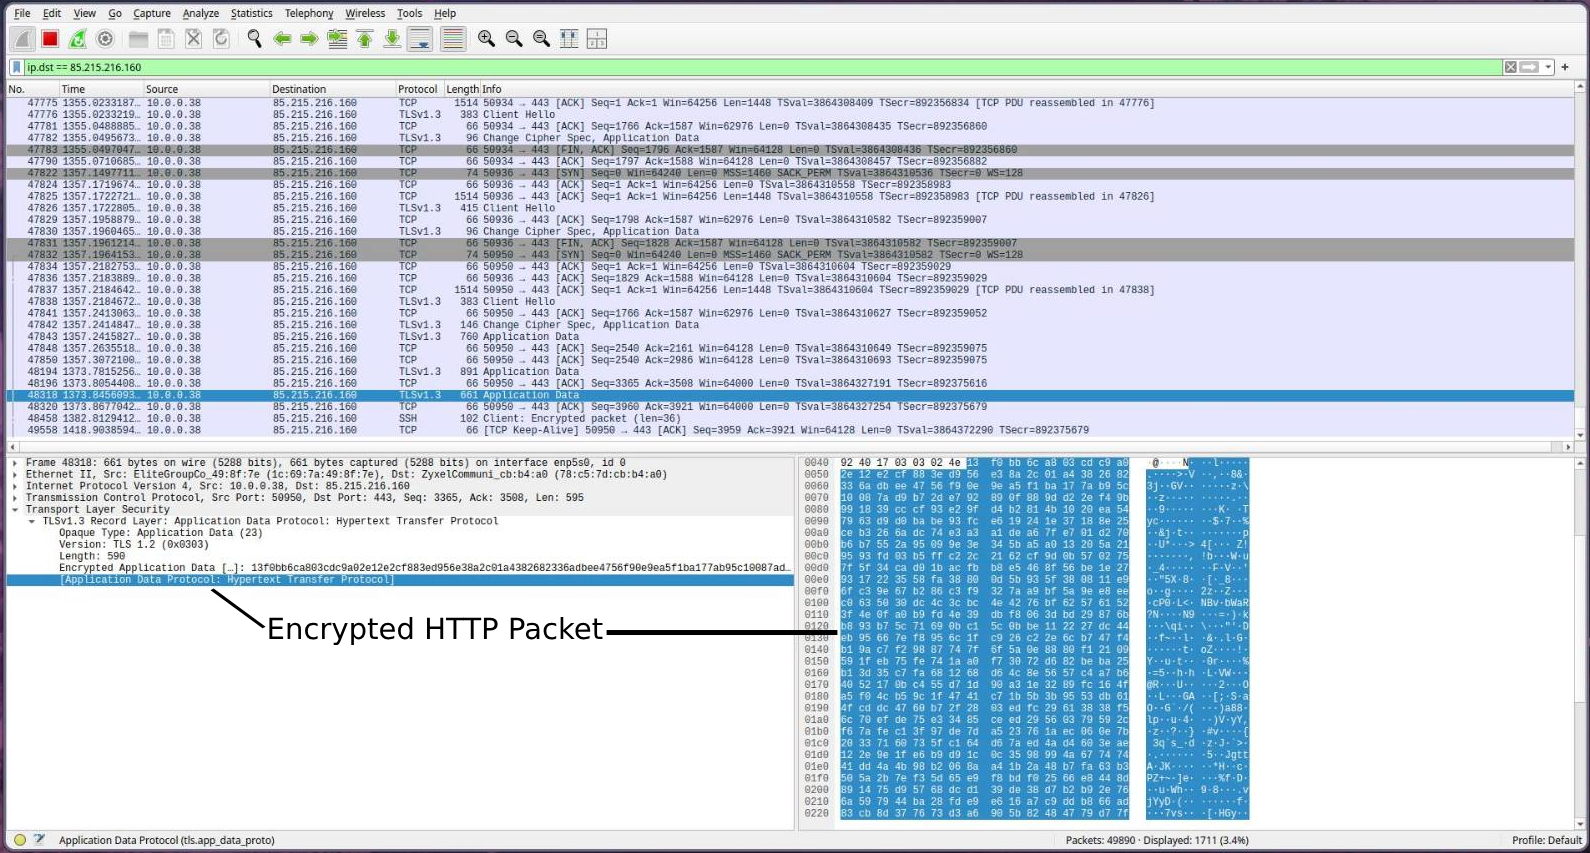
If we open up Wireshark and inspect our traffic, we can see that we can’t view any HTTP traffic. Instead, we only see TLS packets, which contain the encrypted HTTP data, and therefore the credentials can’t be viewed anymore.
Adding a Domain
Since I am doing this on a public VPS, I can’t use a local DNS and need to use a real domain instead. I bought metyr.xyz from Namecheap.
To make Nginx use the domain name, you have to set the server_name in the configuration from server_name _; to server_name metyr.xyz www.metyr.xyz;.
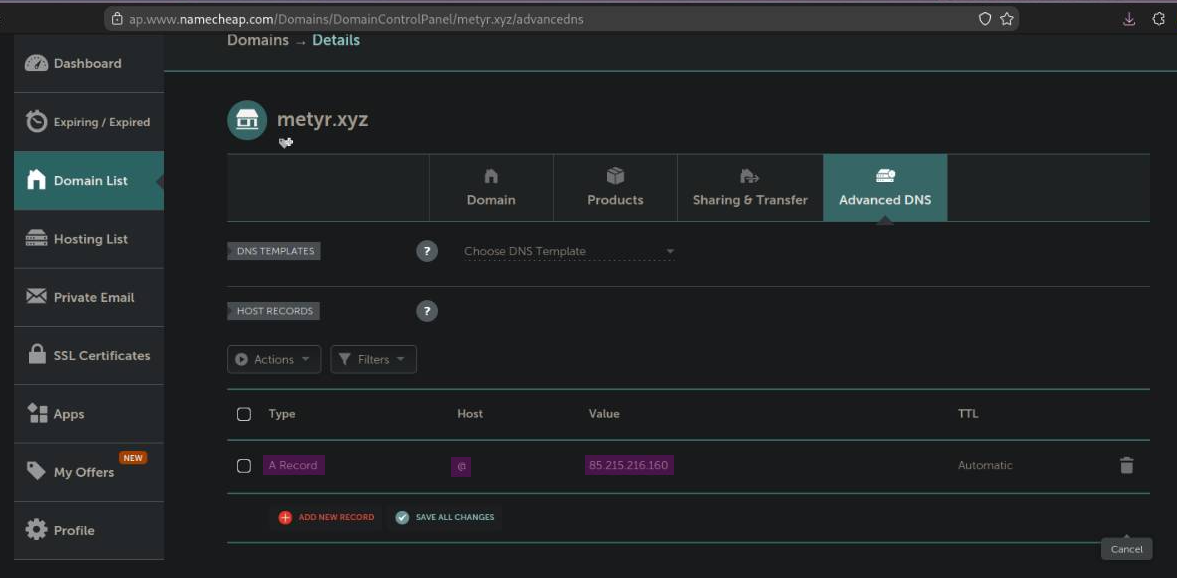
Now we need to create a DNS record for our domain.
This record needs to be of the A type, which returns a 32-bit IPv4 address and is commonly used to map hostnames to an IP address.dns-record-types10 The @ in the Host field is used to denote the current origin, which represents the current domain. In this case, it would be metyr.xyz.rfc11
Lastly, I want to switch from using a self-signed certificate to using an officially signed one by Let’s Encrypt. For this, the certbot and python3-certbot-nginx packages need to be added to our system.
Now we can run this command to generate an SSL certificate, which will be signed by Let’s Encrypt, so the browser won’t give us a security warning anymore.
certbot --nginx -d metyr.xyz --non-interactive --agree-tos -m wedm1ebmf@mozmail.com
certbot-options12
After running this command for the first time and replying if you haven’t saved the certificate, you can use the --force-renewal flag to forcefully renew the certificate in case you lost it or don’t want to set up importing it on a rebuild.cerbot-force-newnew13
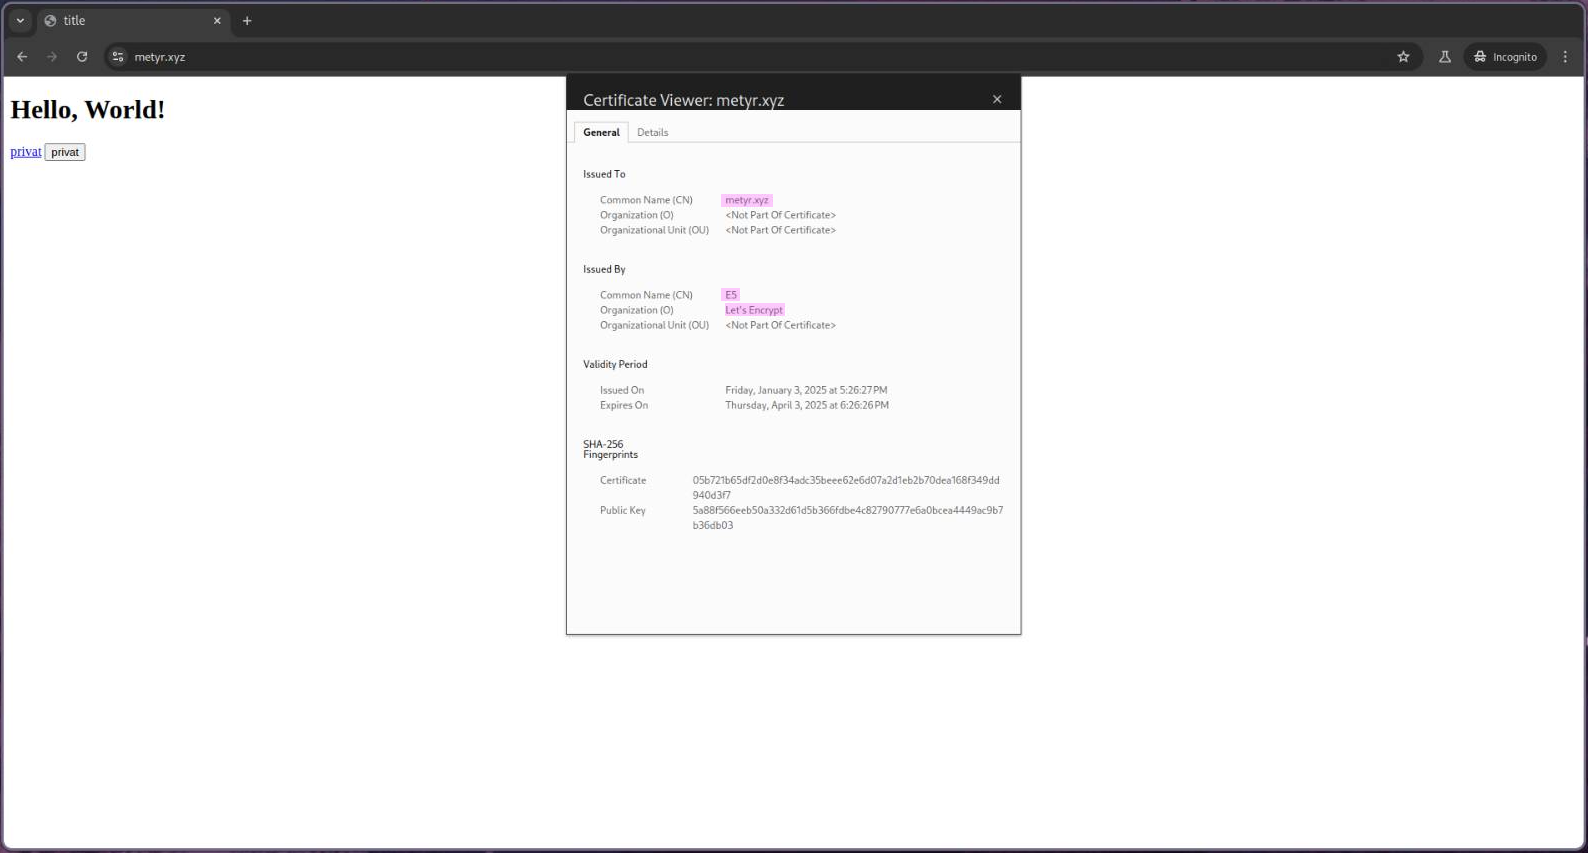
If we visit the website now, we can see that we won’t be prompted with a security warning. If we inspect the certificate, it will show that it was issued by Let’s Encrypt and is trusted.
References
For a full bibliography, see the original BibTeX file.
This task definition was summarized by ChatGPT using the prompt: “Summarize this task definition in English and LaTeX and make it short and abstract.” ↩︎
Vsupalov. Docker ARG, ENV and .env - a Complete Guide. source ↩︎ ↩︎
Apache HTTP Server. htpasswd - Manage user files for basic authentication. source ↩︎
Sling Academy. NGINX location blocks: Understanding and Utilizing URL Matching. source ↩︎
Stack Overflow. Getting basic-auth username in php. source ↩︎
DigitalOcean. How To Create a Self-Signed SSL Certificate for Nginx in Ubuntu 20.04. source ↩︎
ShellHacks. HowTo: Create CSR using OpenSSL Without Prompt (Non-Interactive). source ↩︎
IETF Datatracker. RFC 1035: Domain names - implementation and specification. source ↩︎
Certbot. certbot — Certbot 3.1.0.dev0 documentation. source ↩︎
nixCraft. How to forcefully renew Let’s Encrypt certificate on Linux or Unix. source ↩︎